Hello everyone. Welcome to FTT blog. I hope everyone is healthy. I am fine also. Today, I will show you how you can get an original MasterCard for free. Let us start...
Read the full tutorial for 25-30 minutes to understand and act accordingly.
Benefits:
- 100% original MasterCard will be sent to you.
- You can do shopping in almost every website. For example: Amazon, GoDaddy, HostGator, Namecheap etc.
- You can verify AdWords, Facebook, eBay, PayPal etc account.
- You can receive money in PayPal.
- You can get a bank account in U.S.A. for free.
- You will be able to receive EFT from almost all organizations.
- You can withdraw money from the ATMs all over the world.
- Your name will be written on the card. I mean, you will get your own named card.
- When you will load 100$ or more in the card for the first time, you will receive a bonus of 25$. It means, you can load 100$ or more at once or in several times to get the bonus.
- By this card, you will be able to take payment from Elance, Fiverr, Freelancer, PeoplePerHour, Upwork(oDesk). Besides, you can take payment from hundreds of Affiliate site like ClickBetter, ClickSure, and MaxBounty. You can take payment in Payoneer card from many PPC, PPD, and PPP sites.
How to get a MasterCard?
You will need to follow the below three steps:
- Applying for the Card.
- Giving proof of your identity.
- Activating the Card.
Step 3: Applying for the Card
First, go the website from here. Then, click Sign Up.
Select prepaid MasterCard and click Sign Up button.
Select prepaid MasterCard and click Sign Up button.
Give accurate information in Personal Details. Give the information what you have in the National Identity Card.
You can give your Driving License or National ID Card or Passport as your identity proof. National ID Card is the best choice. Therefore, we will learn to give identity proof through National Id Card. You can use the other two option and follow the steps accordingly.
In the Getting Started page, give your First name, Last name/ Surname and Date of birth from your National ID Card and your Email Address. Suppose your name is Freelancing Technology, and Date of Birth is 12/16/1990 in your National ID Card. Your email address is freelancingtechnology@gmail.com. Now, complete the form typing in the box First name 'Freelancing', Last name 'Technology', Email address 'freelancingtechnology@gmail.com', Re-enter email address 'freelancingtechnology@gmail.com' and Date of birth 12/16/1990. Click the NEXT button.
In the Contact Details page, select your Country; fill up the Street address, City and Postal/ Zip code according to your National ID Card. Select Mobile or Landline, and fill up the box with your contact number. Click the NEXT button.
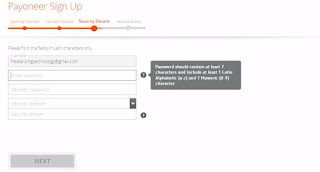
In the Security Details page, fill up the Enter password box with a tough password for your account's safety. You can see this article 'Protect your Facebook account from hacking.' No hacker will be able to hack your Facebook account and follow the first tips to create strong password. Give your password once more in the Re-enter password box. Select a tough Security question and fill up the Security answer box with an answer what only you know. Your account security should be very tight. You can follow the article 'Protect your Facebook account from hacking.' No hacker will be able to hack your Facebook account again and see the 7th tips to know about security question and answer. Click the NEXT button.
Selecting ID Type and filling up the form
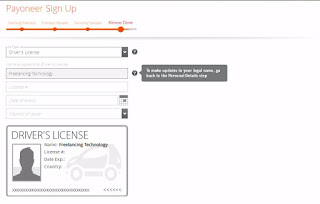 If
you want to proof your identity through your Driving License, then
select Driver's License as your Id Type. Give your License number and
Date of expiry. Select the County of issue.
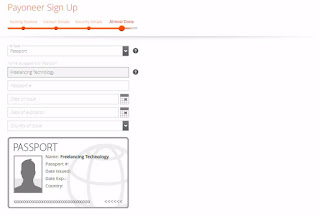 If
you want to use Passport as your identity proof, then select Passport
as your Id Type. Give your passport number, Date of issue and Date of
expiration. Select the Country of issue.
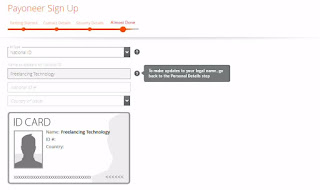 If
you want to use National ID Card, then select National ID as your Id
Type, give your National ID Card number and select Country of Issue.
In the Almost done page, select your Id Type. If you want to use an alternate shipping address, then mark the 'Enter alternate shipping address' box and fill up the form with required information. Read about the Electronic and Cookie Disclosures, Privacy Policy, Terms and Conditions, Global Payment Service Terms and Conditions and Pricing and Fees. If you agree with their policy then mark all boxes to proceed. Click the ORDER button.
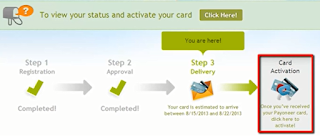
You can see your application status at any time. You need to login with your email and password in Payoneer to check the application status.
You will see something like this image for checking the application status.
In the Getting Started page, give your First name, Last name/ Surname and Date of birth from your National ID Card and your Email Address. Suppose your name is Freelancing Technology, and Date of Birth is 12/16/1990 in your National ID Card. Your email address is freelancingtechnology@gmail.com. Now, complete the form typing in the box First name 'Freelancing', Last name 'Technology', Email address 'freelancingtechnology@gmail.com', Re-enter email address 'freelancingtechnology@gmail.com' and Date of birth 12/16/1990. Click the NEXT button.
In the Contact Details page, select your Country; fill up the Street address, City and Postal/ Zip code according to your National ID Card. Select Mobile or Landline, and fill up the box with your contact number. Click the NEXT button.
In the Security Details page, fill up the Enter password box with a tough password for your account's safety. You can see this article 'Protect your Facebook account from hacking.' No hacker will be able to hack your Facebook account and follow the first tips to create strong password. Give your password once more in the Re-enter password box. Select a tough Security question and fill up the Security answer box with an answer what only you know. Your account security should be very tight. You can follow the article 'Protect your Facebook account from hacking.' No hacker will be able to hack your Facebook account again and see the 7th tips to know about security question and answer. Click the NEXT button.
Selecting ID Type and filling up the form


In the Almost done page, select your Id Type. If you want to use an alternate shipping address, then mark the 'Enter alternate shipping address' box and fill up the form with required information. Read about the Electronic and Cookie Disclosures, Privacy Policy, Terms and Conditions, Global Payment Service Terms and Conditions and Pricing and Fees. If you agree with their policy then mark all boxes to proceed. Click the ORDER button.
You can see your application status at any time. You need to login with your email and password in Payoneer to check the application status.
You will see something like this image for checking the application status.
Step 2: Giving proof of your identity
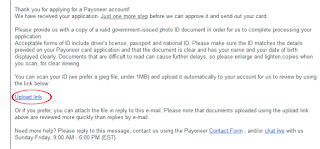
If you have given the proper information of your National ID Card, then you may not need to prove your identity. However, if you get an email for confirming your identity, then work as per below rules.
Within a few hours, you will receive an email to confirm your identity (it may take up to 24 hours). Do not forget to check the spam folder. Take two pictures (a front side and a backside picture) of your national ID Card.
Check your email and click Upload Link to upload the images.
Give name to the images before uploading them. Such as Photo1, Photo2. There should not have any spaces in the name. Do not upload the two images at once. First, upload the front side picture. Check your email again, click the Upload Link once again and upload the backside picture of your National ID Card.
If you have done just as above rules, then you will get the Card within 2-3 weeks.
If you have done just as above rules, then you will get the Card within 2-3 weeks.
Step 3: Activating the Card
The Card will be sent with a letter within 14-21 days. Check Card status regularly by logging in Payoneer and check whether the Card has been sent or not.
After getting the Card, you need to activate it from the website.
You will need to give a PIN code. Give the PIN code that you will remember because the PIN will be needed to withdraw money from ATM.
That is all for today.
If you Like our post, then do not forget
to share. Cheers everybody.
Join me in Facebook.
Like our official Facebook page.
Join me in Google+.
Follow us on Pinterest.
Follow us on Twitter.
Join me in Facebook.
Like our official Facebook page.
Join me in Google+.
Follow us on Pinterest.
Follow us on Twitter.






No comments :
Post a Comment